Blog

  • Packaging Arduino projects

    I made a post over at the popular Arduino forum on a topic where someone was inquiring about available enclosures. The community tends to respond “just 3D print one” but that’s a mistake in my opinion.

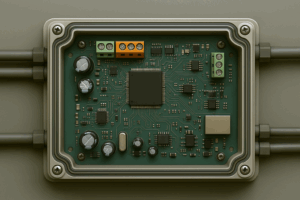
    3D printing, while useful, seems pointless to me unless you’re looking for something not available off the shelf. Even then, the 3D  print falls short if you need a transparent cover, or a NEMA4X /IP66 (washdown-proof) rating, or any number of other structural properties. That off the shelf $20 polycarbonate case has a lot of engineering time put into it and provides a huge amount of convenience.
    As far as laser cut enclosures are concerned, I’ve yet to find one that doesn’t look completely ugly like something a 6 year-old put together for a craft class.

    Seriously, burnt wood edges is not a professional look! I have seen professional enclosures for large machines made out of wood and particle board and you’d never know what the material was.  When designed by an engineer who knows what he’s doing, wood can be a fantastic material.

    The amateurish laser-cut “snap together jigsaw cases” all look like crap in my opinion. And that’s a pity, because you can do some great stuff with a laser cutter. It’s just that the community has apparently decided to embrace the lowest common denominator design quality.

    My gotos for great cases are Polycase & Bud for plastic wall and desk mount enclosures. Polycase is great for getting your enclosures custom modified (cutouts, slots, custom printing, etc.) at reasonable prices. I also like Hammond for metal enclosures (although Bud has some nice aluminum cast boxes). Serpac or OPC for handheld/belt mount types. Altech for industrial enclosures with electrical knockouts (although Polycase is now carrying those also).

    A few links:

    Polycase https://www.polycase.com/

    Bud https://www.budind.com/plastic_boxes.php

    Small Hammond enclosures. I like these for Arduino Nano since they fit nicely and the 1551 enclosure comes in many versions http://www.hammondmfg.com/dwg9.htm

    You can find these and many, many more enclosures for sale at my favorite electronics distributor, Digi-Key. Note that Amazon also carries many electronics enclosures, but I haven’t found enough of a price difference to offset not having reliable datasheets.


    If you’d like to subscribe to this blog, please click here.

  • Arduino Actuators

    An actuator is a device that produces a mechanical action. That’s the generic description, but when people mention “actuator” in conjunction with Arduino, they will typically mean a linear actuator.

    However, as we’ll see, there is much more to the actuator “family” than just the linear types.

    Probably the easiest actuator type to use with Arduino is the R/C servo motor. You can connect them directly to an output pin since they have their own internal electronics.

    Anything else: solenoid, linear actuator, etc., usually will require an external driver and more wiring. Although there are some linear actuators that have the same connections as servos.


    If you’d like to subscribe to this blog, please click here.

  • DF1201S MP3 PlayerPro & Arduino

    One of my uses for this blog to is to record useful information that I (and others) might need later. This is about an annoying problem I ran into.

    I’ve used the DfRobot Player Pro a couple of times in “stand alone” mode. It’s a great audio player: small, cheap, and easy to use. It also has a serial interface so it can be controlled by an arduino or microcontroller. DF Robot provides the DFRobot_DS1201S library to make this easier. However, all the examples I see online are using the playFileNum(num) command that takes an index of a file (MP3) to be played. The problem with this is that the file index depends on the order in which the file file was stored to the Player Pro’s Flash memory.

    There is also a playSpecFile(String) method that takes a filename, which you’d expect is much easier and would be more popular. However, when I tried using it, it always played the same song. OK, time to debug. There is also a method in their library to retrieve the name of the currently playing file. However, when I use code like this:

    // Play file
    DF1201S.playSpecFile("one.mp3");
    // Print name of file that's playing
    Serial.println(DF1201S.getFileName());
    DF1201S.playSpecFile("two.mp3");
    // Print name of file that's playing
    Serial.println(DF1201S.getFileName());
    DF1201S.playSpecFile("three.mp3");
    // Print name of file that's playing
    Serial.println(DF1201S.getFileName());
    

    It always plays the same song and to boot, I get Chinese characters displayed for the file name. Clearly, not what I was trying to play.

    However, make a minor change to the filename and this works.
    

    // Play file
    DF1201S.playSpecFile("/one.mp3");
    // Print name of file that's playing
    Serial.println(DF1201S.getFileName());
    DF1201S.playSpecFile("/two.mp3");
    // Print name of file that's playing
    Serial.println(DF1201S.getFileName());
    DF1201S.playSpecFile("/three.mp3");
    // Print name of file that's playing
    Serial.println(DF1201S.getFileName());
    

    This plays three different songs correctly and their filenames are reported accurately.

    HTH everyone who’s run into the same problem 🙂


    If you’d like to subscribe to this blog, please click here.

  • Replace encoder with resolver

    Yes, you read that right. You can go digital-to-resolver in addition to the more common resolver-to-digital. The converter also takes 0-10V signals and can output a corresponding resolver sine-cosine phased signal.


    If you’d like to subscribe to this blog, please click here.

  • Arduino Digimatic

    I have one of these Mitutoyo Digimatic indicators and thought it would be fun to get a larger display and to be able to record data.

    For those who aren’t familiar, Mitutoyo is an instrumentation company that builds amazing measuring instruments. The image above is a digital dial indicator that measures to a precision of 0.0001″ and can be switched between inch or millimeter units. It uses a vacuum fluorescent display, so it’s readily visible, but kind of a power hog.

    Digimatic is a product line dating back to at least the 80’s that provides measurement data digitally from the device. It’s a pretty simple protocol and easily decodable with Arduino.


    If you’d like to subscribe to this blog, please click here.

  • Sensor data into your PC

    Software and hardware integration is a general term for accessing external hardware devices from your PC, tablet or phone. Most existing systems handle common devices such as a printer, as part of the normal operations. But what about a weigh scale? Or a temperature sensor? Or a counter? What if you need to track when an item enters a manufacturing cell and again when it leaves? There are examples of sensor data that your desktop PC or server is not equipped to handle without additional software drivers or specialty applications.

    Communication channels

    Ethernet, USB, Wi-Fi and Bluetooth are all modern methods of communicating with external devices. There are older communication channels such as RS232 serial that is not well supported by modern PCs. Newer scales often use USB or Ethernet these days.

    Wi-Fi and Bluetooth have become very popular for sensor communications because they remove the need for a physical cable connecting the sensor and computer.

    While RS232 is a very old protocol (it dates back to the late 1960’s!) that is not directly supported by hardware in modern PCs, it has been so popular over the years that alternate ways of connecting to RS232 ports have arisen. Typically, if you have a PC and need to connect to something with an RS232 serial port, such as a scale, you can use a USB to Serial adapter to handle this task.

    Hardware/software integration, also known as system integration, involves combining hardware components and software applications into a cohesive system. This process ensures that different hardware and software elements work together seamlessly, allowing for efficient data sharing and process automation.

    Key Components of Hardware/Software Integration:

    1. Hardware: Physical devices such as sensors, cameras, or measuring instruments.
    2. Sensors: Convert analog signals from hardware into digital data.
    3. Connectors: Communication buses like USB, Wi-Fi, Bluetooth, or Ethernet that transfer data between hardware and computers.
    4. Software: Programs that control hardware tasks and process data.

    Benefits of Integration:

    • Improved Efficiency: Streamlines workflows by enabling different systems to communicate and share data.
    • Cost Savings: Often cheaper than replacing disjointed systems with a new one.
    • Enhanced Decision-Making: Provides accurate and comprehensive data for better analytics and reporting.

    Challenges:

    • Compatibility Issues: Different systems may use various technologies, requiring significant effort to integrate.
    • Security and Compliance: Ensuring data security and compliance with regulations can be complex.

    Examples:

    • Temperature Monitoring: Systems that record and report temperature data from thermometers.
    • Food Wastage Monitoring: Applications that track food wastage using weighing scales and cameras.


    If you’d like to subscribe to this blog, please click here.

  • Encoder to Resolver

    Description

    Converts 0-10V absolute position or quadrature encoder position outputs to resolver (sin/cos) format for motion control retrofit.

    Specifications

    • 12-bit resolution differential sine/cosine resolver outputs
    • Resolver output swing (bipolar): 12VAC max.
    • Resolver excitation input range: 12VAC max. @ 15 kHz
    • 0-10V position indicator input
    • Quadrature encoder (differential) digital inputs
    • Encoder input rate: 100kHz minimum
    • Power supply input: 24VDC
    Resolver signal
    Resolver signal


    If you’d like to subscribe to this blog, please click here.

  • Arduino Programming: About time

    Time is probably the most commonly controlled process variable. Timers are all over the place in industrial control. Odds are, if you need some type of timer, no matter how strange, you can find it off the shelf.

    Now, many of these timers used a chip usually referred to as the “555.” The LM555 originally made by (I think; someone will correct me) National Semiconductor was a very versatile device, but it was at the heart of many time-delay relays, short timing circuits, etc.

    So once upon a time, if you wanted to build a basic timer, odds are you would wire up a 555 into a circuit. To build a handful, or just one, you’d use a perf board,

    perfboardmaybe you might use wire wrap or even dead-bug construction (my favorite!)

    deadbug

    It would be time consuming,but maybe you had no choice because the timer had some weird requirement that no off the shelf timer had, or needed to fit into an oddly shaped space.

    What does this have to do with Arduinos? Well, you can program any timing sequence into an Arduino. Say you want the heater on a commercial ironing board to come on for five seconds when the operator lowers it, a 555 does it easily. If you want the heater to come on for five seconds and when the board is raised again, a fan to blow for 10 seconds to cool the clothing, the 555 can still be used. Maybe you need two of them. But now, the Arduino becomes an easier solution. Whether you need one time sequence, or dozens, a single Arduino can be programmed to do it. When you factor in the labor of wiring a circuit board with the 555, the low off the shelf price of the Arduino makes it even more attractive.

    This is the wonder of the time we live in: an off the shelf microprocessor board is now inexpensive enough to be used for logic replacement.

    Amazing


    If you’d like to subscribe to this blog, please click here.

  • Arduino Programming: Turn water on with Arduino and solenoid valve

    Arduinos are popular small microcontroller boards that have many applications. However, they’re not designed to switch loads above a few milliamps: say a couple LEDs or so. While power-driver shields do provide this capability, they also can consume more resources than you may be able to give up.

    We developed a high current driver to make it easy to control a solenoid valves with Arduino. It will also control pumps and motors. With an adapter cable, it can easily connect to your Arduino, BeagleBone, Raspberry Pi or other digital controller without soldering or crimping any connections. Doesn’t get any easier than that.

    PwrDrvr1

    The power driver board was born out of a need for controlling a 1 amp solenoid valve using an Arduino.  The solenoid valve was being used to control the water flow to fill a tank automatically. Now there’s a simple way to use your Arduino or compatible to switch up to 3A at 24VDC. Two output connections (the white wires shown above) connect directly the load (your solenoid, relay, motor, etc) and the power (red, black) go to the power supply (5 -24 volts). The orange lead is used to switch on and off. This is a low-voltage (5V) control that can connect directly to a microcontroller, or development board. An onboard LED indicates when the load is switched on.

    Here’s some sample code that implements a timer with an Arduino. When the pushbutton is pressed, it turns on water flow for 3 seconds

    // This sketch demonstrates a simple timer
    // A load (motor, solenoid, relay, solenoid valve is on Pin 1
    // A pushbutton to trigger the timer start is on pin 2
    //
    // When the pushbutton is held down for more than 0.1 second 
    // then released, the timer starts
    // and times out after 3 seconds
    //
    // Timer is retriggerable: if pushbutton pressed 
    // during the timeout period, timer restarts
    //
    // Constant definitions
    #define LOOP_INTERVAL 10
    #define TIMEOUT 300 * LOOP_INTERVAL
    #define TRIGGER_INTERVALS 10
    #define TIMER_INACTIVE -1
    #define TRIGGER_PIN 0
    #define OUTPUT_PIN 1
    
    void setup()
    {
      pinMode(OUTPUT_PIN, OUTPUT);
      pinMode(TRIGGER_PIN, INPUT_PULLUP);
    }
    
    void loop()
    {
      static int count = 0;
      static int timer = TIMER_INACTIVE;
      // Process loop periodically
      delay(LOOP_INTERVAL);
      
      // Check trigger input
      if (digitalRead(TRIGGER_PIN) == LOW)
      {
        // Must hold down pushbutton for the entire interval and 
        // then release to trigger
        count++;
      }
      else
      {
        // push button released. Check if we should start timing
        if (count >= TRIGGER_INTERVALS)
        {
          // Turn output ON (timeout is retriggerable)
          digitalWrite(OUTPUT_PIN, HIGH);
          timer = TIMEOUT;
        }
        count = 0;
      }
      
      // If timer active, count down
      if (timer != TIMER_INACTIVE)
      {
        timer -= LOOP_INTERVAL;
        if (timer == 0)
        {
          // Turn output OFF
          digitalWrite(OUTPUT_PIN, LOW);
          timer = TIMER_INACTIVE;
        }
      }
    }      
    

    Let’s find out what new applications you can come up with.


    If you’d like to subscribe to this blog, please click here.

  • Don’t do what Donny Don’t does

    Item #1: do not try to power motors from the Arduino 5 volt output pin. There, I said it.


    If you’d like to subscribe to this blog, please click here.