Categories
Uncategorized

Making connections

So you’ve got a piece of electronic hardware. Perhaps it’s a motor controller, or one of our serial relay controllers or serial pulser readers, or even an Arduino.

Now you want to connect it to a sensor, or drive a motor. or even just get power to it. This is where the issue of interconnections raises its head. It may seem simple to do a task like connecting a 12 volt DC power supply to an electronic board, and often it is. But it can become complicated very quickly. Some of the questions that must be considered when connecting two pieces of electronics together are:

  • How many connections are there?
  • How far apart are the items to be connected?
  • Do you need to conduct low level analog sensor signals or digital controls?
  • How much current does the connection carry?
  • Is the connection permanent or temporary? Will it be connected and disconnected frequently?
  • Is the environment likely to cause connections to become loose? Is there a lot of vibration or motion present?

Let’s stop here before the number of things to consider gets out of hand. The first thing to consider is the type of signal and how the wiring will be terminated.

Selecting wire

Low level signals such as those from temperature or pressure sensors should use shielded cable. This is because those signals are typically very small and they can be affected by electrical noise. Electrical noise is the interference generated by electric motors, or other nearby magnetic fields. Other signals like digital control lines, or power connections, tend to not need shielding except in unusual cases.A shielded cable has at least one insulated center wire that carries the signal and a wound, solid or braided conductive shield around the signal wire. The shield is connected to ground to protect the signal wire from interference.

Most signals can be carried moderate distances by fairly small wire. We normally recommend stranded 24-26AWG (American Wire Gauge) size wire for most sensor and control signals. Keeping the wire thin has several advantages:

  • It uses less copper and so is less expensive
  • It is more flexible, which is important if you are bundling large numbers of conductors or need to negotiate sharp bends around equipment
  • Less copper also means less weight

Stranded wire is preferable in most cases because it is less likely to break when flexed. It can also be more easily crimped onto connector pins. Stranded wire is specified by the overall size, the number of conductors, and the gauge of each conductor. So a 24 AWG wire may be stated as 24 AWG 7/30 meaning it is made from seven strands of 30 gauge wire.

For wires that carry power, a larger gauge is used. For specific amounts of current and length of wire, you can refer to tables found online, but in general wire in the range of 18 to 22 gauge will meet the most common requirements of moderate distances (up to 20 feet) and current (up to 1A).

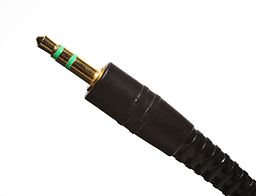
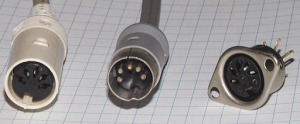
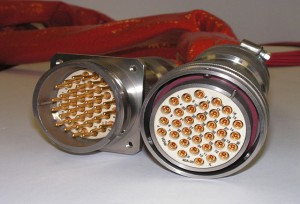
In the next post, we’ll discuss what options there are for interconnections between wires and from wire to board.


If you'd like to subscribe to this blog, please click here.
Categories
Uncategorized

.NET Light Meter via serial port

This is a quick implementation of an idea I had. Someone online asked for the cheapest way to read light levels into a Windows application.

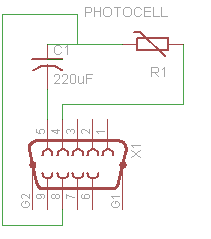
The lowest cost way I could think of was to avoid a microcontroller or other logic component and use whatever was already on a modern PC. My idea was to use a Cadmium Sulphide (CdS) photocell. CdS cells are used in many camera light meters and work by changing resistance in response to ambient light. By using the current through a photocell to charge a capacitor, we can tell the light level by measuring the time taken to charge. In days of old we could have used a joystick port to do this, but those are long gone, now replaced by USB-connected joysticks.

On PCs without joystick ports, we could have done the same thing with the printer port. However, those are also a thing of the past.

Many PCs still come with serial ports, so we’ll try those. If not, a USB to serial converter will work. The Clear To Send (CTS) and Data Terminal Ready (DTR) lines can be controlled from a Win32 or .NET application. There is some concern about the responsiveness of Windows, but as long as we avoid very short time constants, we can get usable data.

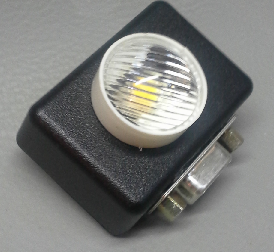
The concept is to build an RC circuit from a photocell and a 200uF capacitor. The photocell is driven from the DTR line and the junction of capacitor and photocell is read by the CTS input. Here’s the schematic: it’s pretty simple.

The results are surprisingly useful: discharging the circuit for two seconds and then charging it while polling the CTS line every 5 milliseconds shows a clear difference as the photocell is pointed at various areas of a lighted room.

Code to use this circuit is on GitHub.


If you'd like to subscribe to this blog, please click here.